Accept a suggestion
- Tab — insert the whole suggestion.
- ` (backtick) — insert just the next word, and keep the rest in view.
- Esc — dismiss the suggestion without inserting anything.
Typing the next character yourself works too. If what you type matches the hint, TypeNext simply trims what it's showing — no pause, no model wait. You're never locked into a suggestion.
Get a different phrasing
Close but not quite? Press ⌥1 to rewrite the current hint a different way. TypeNext keeps up to three phrasings and cycles through them; when they run out it tells you there's nothing else. The alternatives reset the moment you accept a hint, type, or move to another field.
Where suggestions appear
Most of the time the suggestion sits inline, right at your cursor. In a few apps — Chrome's address bar, VS Code, and web pages in Safari — macOS doesn't report a reliable cursor position, so TypeNext shows the suggestion in a small panel just below the line instead. That's deliberate: it keeps the hint from landing on top of the text you've already typed.
Pause or stop suggestions
- Pause everywhere. Press ⌥⌘T, or flip the switch in the menu-bar popover. TypeNext keeps running; it just stops suggesting.
- Pause the current app. Press ⌥⌘P for a ten-minute break in the app you're in. Everything else keeps working.
- Block an app for good. In Settings → Text Completion, add it to the blocked list. Suggestions never appear there until you remove it.
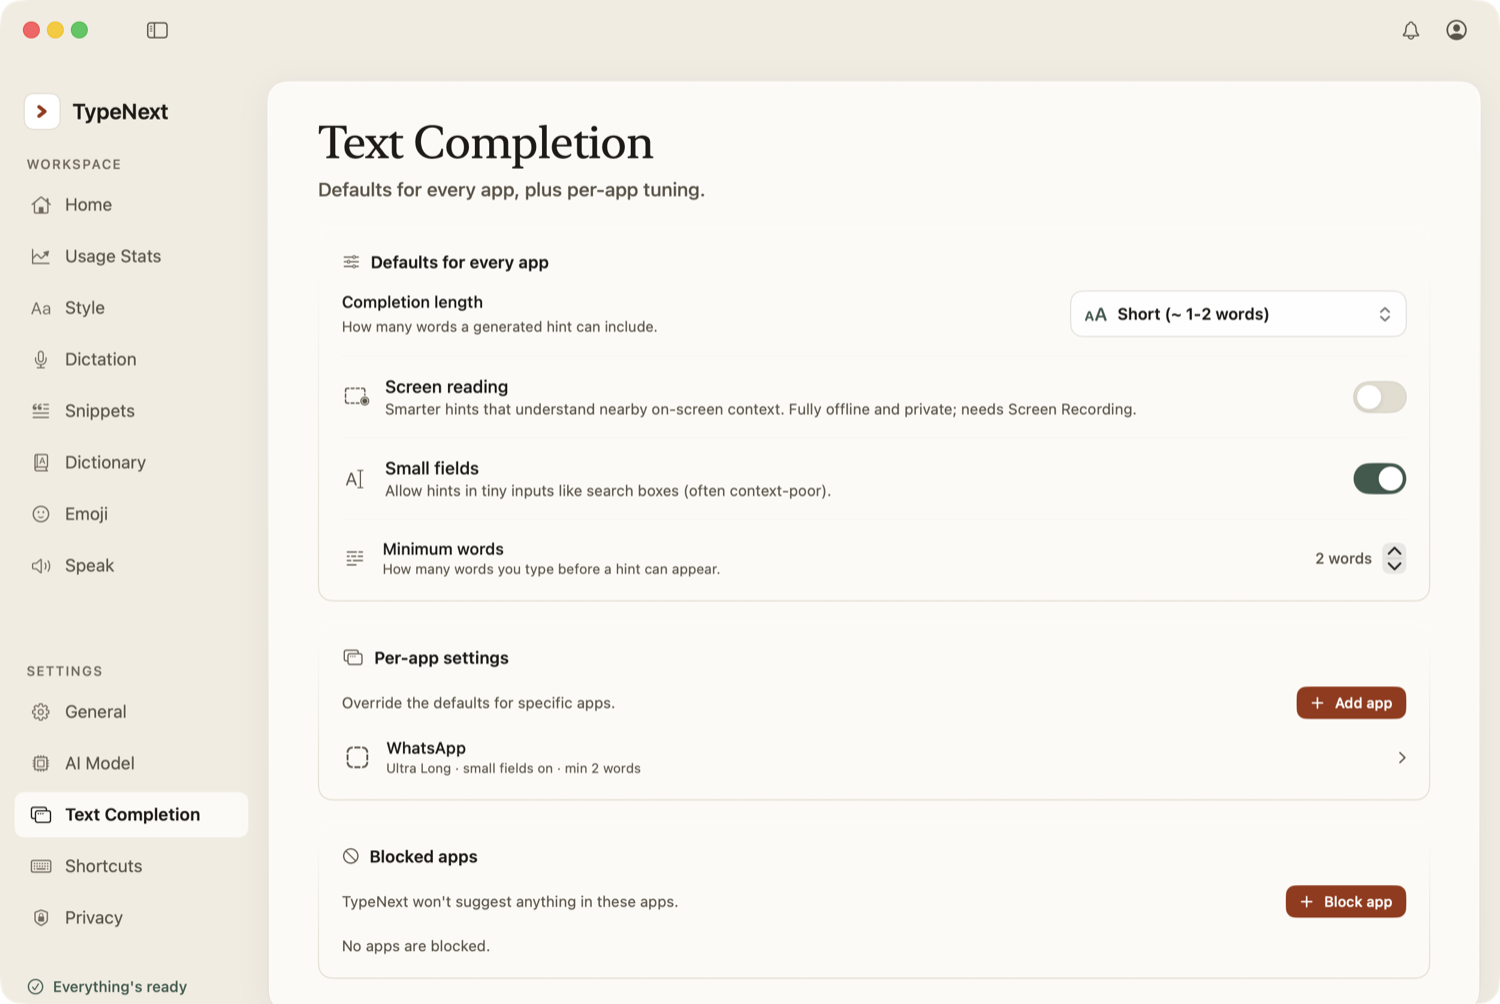
Tune it per app
Open Settings → Text Completion to set your defaults, then override any of them for a specific app:
- Length — how much to suggest, from short to long.
- Minimum words — how much you type before hints start (default: two words).
- Small fields — whether to suggest in search bars and address fields (off by default).
- Writing instructions — a short note on tone or length the model follows. To set tone by app category instead, see Style.
Writing in an editor or email? Turn on Writing Mode for that app to get quicker, document-aware suggestions.